Description
I know, it’s not springtime. But that
doesn’t mean that this little fly won’t work
for you. If you turn over rocks in most any
freestone stream, you’ll find little “green
rock worms.” These bugs are caddis larvae.
Without getting into the entomological
intricacies of caddis species, some caddis
larvae make cases and some are free-living.
If you look closely at what you find on
rocks or amongst the debris on the stream
bottom, you’ll notice that the bright green
“worms” can be of both types. In other
words, there will be some crawling about,
and others inside their cases. If you grab
one of the little square cases and open it
up, you will see what I mean. The little
cased variety engage in “behavioral drift”
from time to time at certain times of the
day. This just means that they leave their
cases and drift downstream where they
establish a new home and build a new case. I
don’t know (and entomologists say they don’t
know either) exactly why this happens, but
it indeed does. And, luckily for fly
anglers, the fish know about this
phenomenon. The Spring Pupa is actually just
a chartreuse Fox Poopah, tied in exactly the
same way as the regular Poopah series flies.
In my experience, this fly works well as an
imitation of either a free-living caddis
larva caught in the current, or a cased
caddis larva engaging in behavioral drift. I
use it as a “stinger” (a third fly) off the
bottom fly in a two-fly nymph rig. It saved
the day for me and my client recently just
above Pollard Flat on the Upper Sac, where
it accounted for a good number of very large
rainbows.
Tying Instructions
|
|
1. Smash the hook barb unless you
are using a barbless version of the
hook, and slip the bead around the
bend. Cover the shank with thread.
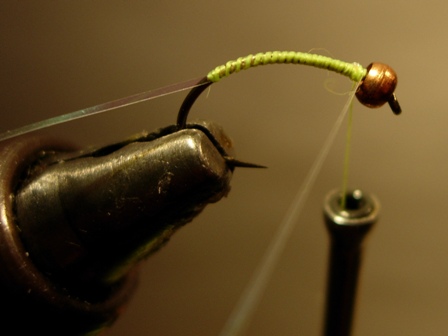
2. Tie in a piece of crystal flash (will be
used as ribbing) just above the hook barb,
and move the thread to the bead. At that
point, tie in another piece of crystal
flash.
|
 |
|
|
|
|
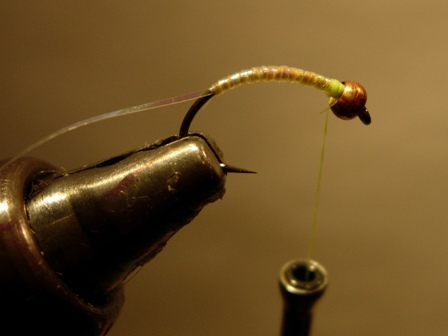
3. Wrap this piece of crystal flash
back to where the first piece was
tied in, and forward again to the
bead. Tie it off there. This forms a
shiny underbody.
|
 |
|
|
|
|
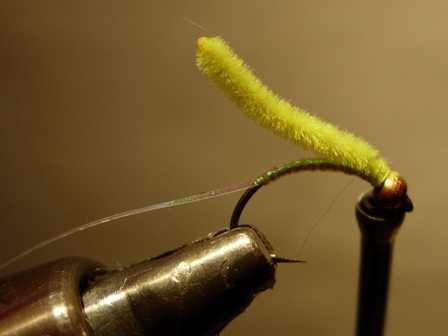
4. Cut a piece of Ultra-Chenille to
1.5 times the length of the shank.
Using a lighter held away from its
tip, singe it lightly so that it is
rounded off. With the singed end
pointing to the rear, tie it in just
behind the bead.
|
 |
|
|
|
|
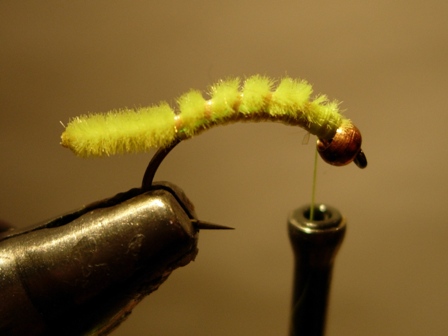
5. Rib the abdomen, using 4 or 5
wraps.
|
 |
|
|
|
|
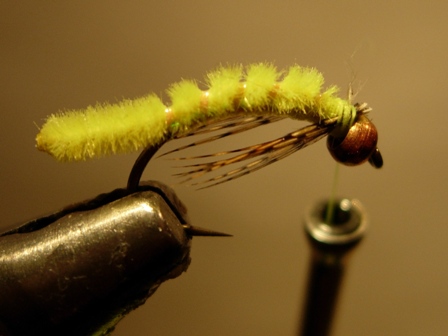
6. At the same spot, tie in the legs on
the underside of the hook, “beard”
style. Make this very sparse; otherwise,
it will detract from the principal
elements of the fly. In other words, we
want a hint of legs—nothing more.
|
 |
|
|
|
|
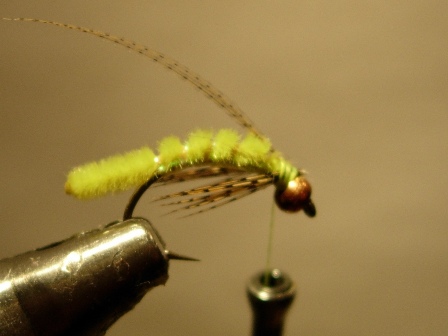
7. From a wood duck flank feather, cut
two barbules and tie them in behind the
bead, tips to the rear. When tied in,
they should be just a tiny bit longer
than the end of the body. This
represents the antennae. |
 |
|
|
|
|
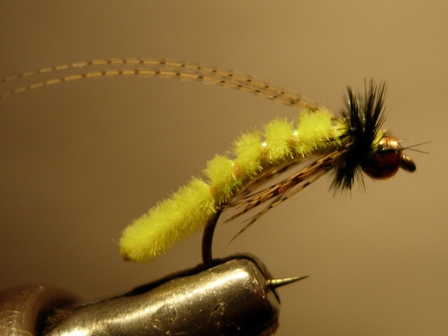
8. Tie in a piece of black ostrich herl
behind the bead, and take 2 or 3 wraps.
Tie it off and whip finish behind the
bead. |
 |
|
|
|
|
Tying
Tips
1. Don’t add weight to this little
gem; in my opinion, it kills the
action of the fly, and distorts the
shape of the underbody.
2. Cut and singe a dozen
bodies at a time; it will save you a lot of tying time, and will result in more
uniform, consistent bodies.
Tie the
Spring Pupa on as a dropper, or as a third fly off of your point fly in a nymph
rig. Set the hook at the slightest hesitation of your leader.
Go rip a few lips, and….see
ya on the creek. |
|
|
|
|
 |
|