Description
It never hurts to revisit some of our
“older” patterns that have been mainstays
for a very long time. We tend to forget some
of the old classics amidst the hype about
new materials, exotic patterns, and an
ever-expanding universe of new “must-have”
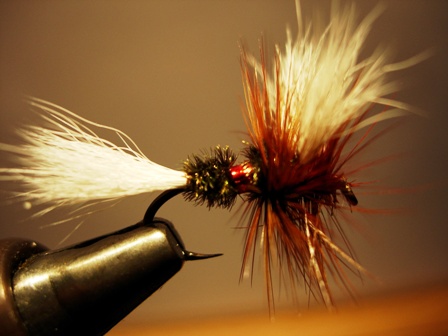
flies. The Royal Wulff certainly qualifies
as a classic Catskill-style dry fly. I have
heard many opinions over the years as to why
fish attack this odd-looking creature. What
it boils down to is that no one knows why it
works—it just does. I consider it to be a
“searching” pattern because it suggests many
different insects. For example, its body
configuration could represent an ant.
The Royal Wulff is one of a series of Lee
Wulff creations. If you want to learn more
about Lee Wulff and his famous series of
high-floating, durable dry flies, visit the
following page from the Federation of Fly
Fishers web site:
http://www.fedflyfishers.org/FlyOfMonth/wulff.htm
.
Tying Instructions
|
|
1. Smash the hook barb unless you are using
a barbless hook. Cover the shank with thread
wraps.
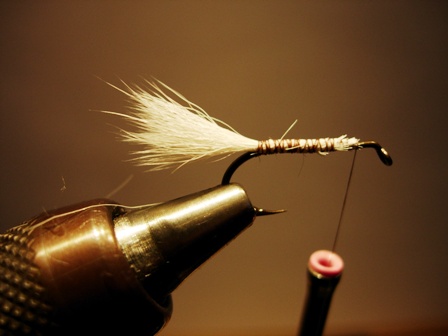
2. For the tail, cut a small bunch of calf
tail or calf body hair and even up the tips
after cleaning out the under-fur. The
measurement reference for the wing length is
the length of the shank. Tie in the hair at
the end of the shank, just above the back of
the barb (or where the barb would be if the
hook was not barbless). Use the “45 degree"
technique to tie in the hair,…see my web
site for instructions on this technique, at
the following page:
http://billcarnazzo.com/flytying/tipsandtricks/index.htm
|
 |
|
|
|
|
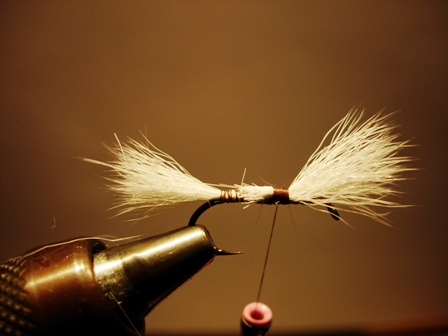
3. Move the
thread forward to the forward 1/3 point. Cut and clean a larger bunch of hair,
and even up the tips. The measurement reference for wing length is the length of
the hook shank plus a tiny bit extra. Tie the hair in with the tips out over the
eye, again using the 45 degree technique. Trim the butts on a taper toward the
tail, and cover most of the butts with thread with firm wraps.
|
 |
|
|
|
|
4. Stand the wing up and take a few wraps in
front of it. Don’t apply more than a few
wraps; building up a big shoulder in front
of the wing base will cause big problems
later when you get to the point of wrapping
the hackle.
5. Take several wraps around the base of the
hair to gather it into a nice bunch. Take
another wrap around the base, but this time
trap the thread in the remaining wing butts
and pull the wing rearward. This will make
the wing stand up straight. Apply a few more
wraps in front of and behind the wing.
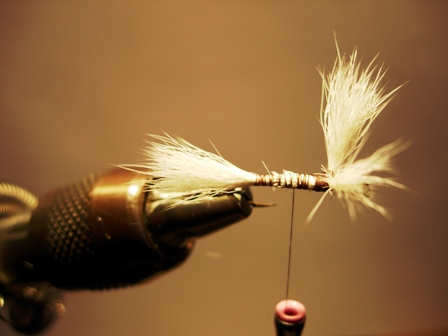
6. Using your bodkin, separate the wing into
two equal bunches. Separate the bunches and
wrap diagonally through the separated wings,
first one way and then the other. Again,
don’t use many wraps—a few will do. Apply a
drop of super glue to the base of the wings. |
 |
|
|
|
|
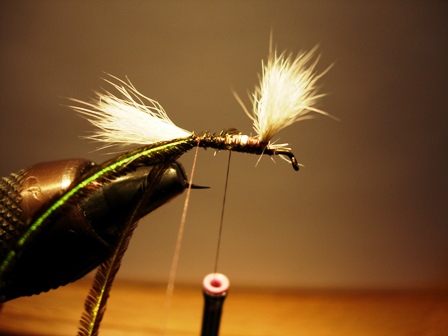
7. Return the thread to the tail tie-in
point and make a loop as you would if you
were going to make a dubbing loop. Cut one
end of the loop and let the loop thread
hang free for now. |
 |
|
|
|
|
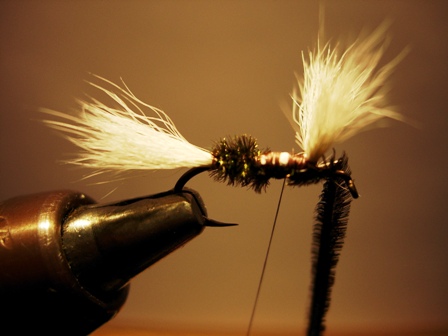
8. Tie in three 3 peacock herls by their
tips. Wrap these around the piece of hanging
loop thread and twist the thread and herl
into a tight “chenille.” Grab the herl
chenille with your hackle pliers and make
two or three tight wraps to make a butt.
Don’t cut the herl. Instead tie it off and
move the chenille forward and out of the way
for the moment. |
 |
|
|
|
|
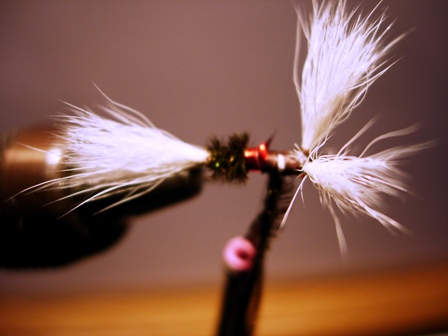
9. Tie in a piece of red floss or red mylar tinsel where you tied off the herl
chenille. Take several wraps of this material and tie it off. |
 |
|
|
|
|
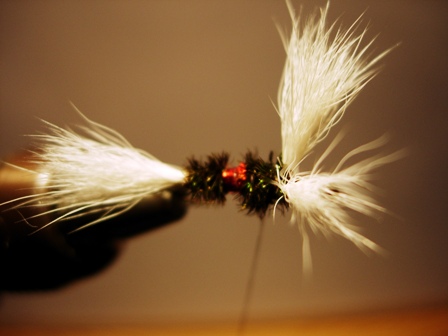
10. Wrap another section of the herl chenille up to the rear of the wings and
tie it off there. |
 |
|
|
|
|
11. Tie in a high quality brown
saddle hackle just behind the wing.
If you are using neck hackle, tie in
two hackles as this fly is meant to
be bushy.
12. Wrap the
hackle forward, taking 5 or 6 wraps behind the wing and an equal number in front
of the wing. Tie off the hackle and whip finish.
|
 |
|
|
|
|
Tying
Tips
1. I prefer the Mylar tinsel to floss. The
tinsel will not darken like the floss when
it is wet.
2. Apply a liquid silicone
substance such as the one made by Mucilin to your dry flies as they come off
your vise. Allow 24 hours drying time before using the flies. This will create a
waterproof coating.
Fish this beauty in riffles.
Keep it floating high and dry. You will like its visibility on the water. The
white wings show up like a neon sign.
|
|
|
|
|
 |
|

