Description
“Old” flies—ones that have survived the
test of time—tend to be simple, starkly
sparse, and spot on when it comes to hooking
up. The Partridge and Orange Soft Hackle
(“POSH”) is a perfect example of that
paradigm. Handed down to us by our brethren
across the pond, it has been attached to
leaders here for many years.
It is a consistent producer,
ultra-simple to tie, and sleekly sparse in
appearance.
The history of this fly, and some
tying information, can be found at the
following link:
http://flyanglersonline.com/features/oldflies/part374.php
I always have soft hackle flies in my
working fly boxes, and the POSH occupies a
prominent place among them. There are
similar patterns out there, but the true
original was constructed of just two
materials (other than the hook): thread, and
partridge hackle. Variants include a ribbed
model, and one with a dubbed or wound
thorax. The purpose of ribbing is, in my
view, to give a segmented look to the body;
the purpose of a thorax is to keep the
hackle from flattening itself against the
body while the fly is in the drift. There
are other modifications out there, but for
our purposes we’ll just add the ribbing and
the thorax, to keep things simple and
sparse. Oh, and one more thing—we’ll add
some floss or silk for the body, instead of
just using thread.
Tying Instructions
|
|
1.
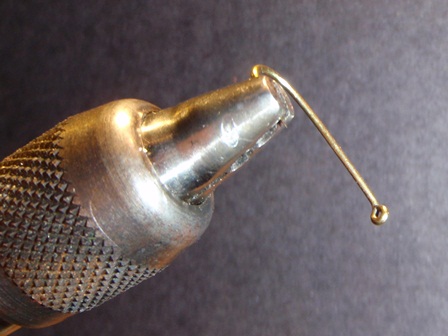
Smash the hook barb (unless you’re
using the barbless version of the
3761).
|
 |
|
|
|
2.
Cover the shank with thread, leaving
it at the rear of the hook, just
above the hook point (note that this
is different than where we’d
normally stop; i.e., the normal stop
point is the back of the barb).
3.
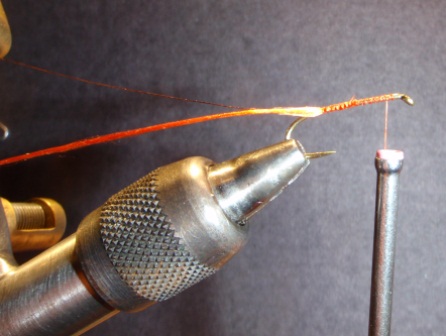
Tie in a piece of fine gold or
copper wire.
4.
Tie in a 4” piece of orange floss or
silk at the same point, and move the
thread forward to the eye of the
hook.
|
 |
|
|
|
|
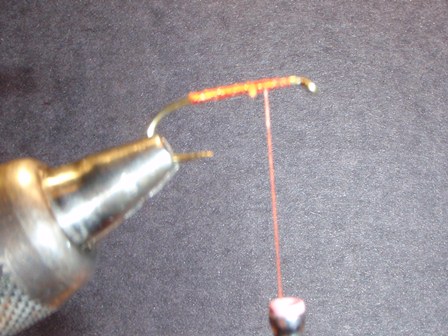
5. Carefully
wrap the floss or silk forward to
the front third point on the hook
shank.
Tie it off there and trim the
excess. Rib the fly, using 4 or 5
wraps; tie off the wire at the same
point and trim the excess. This
completes the body. Leave the thread
at the front third point.
|
 |
|
|
|
|
6.
a.
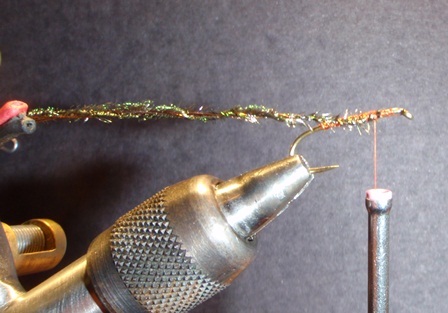
For the thorax, tie in another piece
of wire at the same point, along
with two pieces of fine peacock herl
(here it is important to use the
extra-fine wire; otherwise, the herl
will be overpowered). Twist the wire
and herl together in a
counter-clockwise direction, until
you have a nice, tight herl
chenille.
|
 |
|
|
|
|
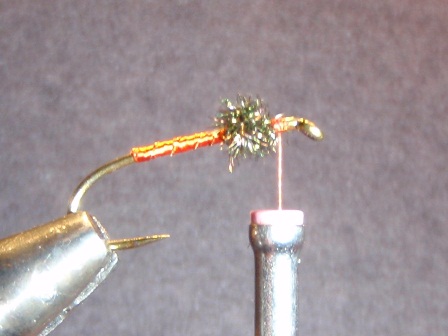
6. b.
Wrap the herl chenille around the
shank, building up a nice thorax;
leave plenty of room between the
thorax and the hook eye for the
hackle. Tie off the herl chenille
and trim the excess.
|
 |
|
|
|
|
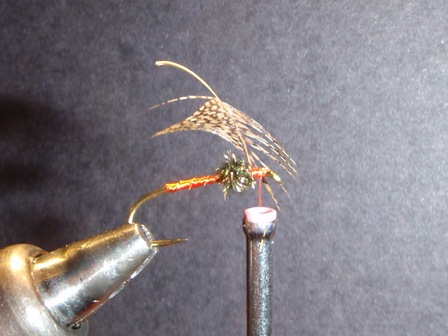
7. At the front of the
thorax, tie in a properly sized
brownish partridge feather by its
tip (see below under “tips” for
feather preparation hints). Using
your hackle pliers to grip the stem
of the feather, take two turns of
the hackle, tie it off, and trim the
excess.
|
 |
|
|
|
|
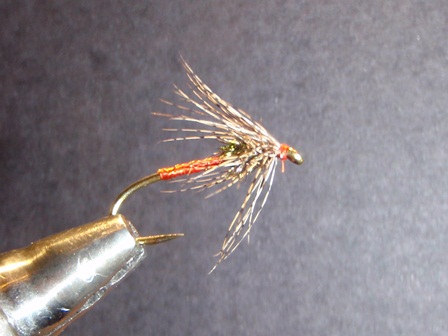
8.
Form a nice, small head and whip
finish. Carefully add a tiny drop of
cement to the head, being careful
not to get the glue on the hackle.
If you use too much glue, it will
leach up into the hackle, rendering
it useless.
|
 |
|
|
1. To prepare the hackle,
remove the fuzz at the base of the
stem (don’t cut the stem off). Then,
using your tweezers, grab the tip of
the feather and smooth back the
barbules. It helps to moisten the
feather a bit during this process.
That exposes the tip for ease of
tying it onto the hook.
2. When tying in the ribbing
and the floss, tie them in at the
front one third point on the hook
and then wrap them down to the hook
point. This will help in maintaining
a nice flat, smooth body. Use as
little thread as possible, and try
not to overlap thread wraps.
Crank out
a bunch if these puppies and
fish them
through riffles, run, and
pocket water, and….
 |
|
