Description
In both September and December of 2008, I
fished Mexico’s premiere trophy bass lakes.
There are two main bait fish that the bass
in these lakes voraciously consume, leading
to their unusually large size: Tilapia, and
Threadfin Shad. Here are pictures of these
two species:


Tilapia (a la
carte)
Threadfin Shad
 Using
subsurface patterns designed to replicate
these two bait fish, I did reasonably well.
But, like many fly anglers, I like to
experiment—actually, in my case, it’s a
contrarian philosophy, which leads me to
push the envelope by trying flies that
perhaps no one else has thought to use
(although that may be a bit presumptuous on
my part). Using
subsurface patterns designed to replicate
these two bait fish, I did reasonably well.
But, like many fly anglers, I like to
experiment—actually, in my case, it’s a
contrarian philosophy, which leads me to
push the envelope by trying flies that
perhaps no one else has thought to use
(although that may be a bit presumptuous on
my part).
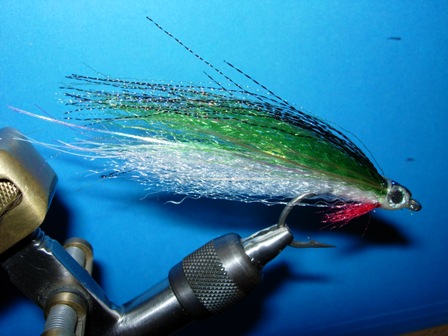
So, I asked myself this question: Why
wouldn’t these carnivorous, aggressive fish
also be cannibals? In other words, don’t
they also eat baby bass? Fortunately, I had
included in my vast array of bass bugs a few
that look like baby bass, based on a pattern
I saw in one of the bass magazines. As
usual, I modified it significantly to suit
my own theories of imitation, and the result
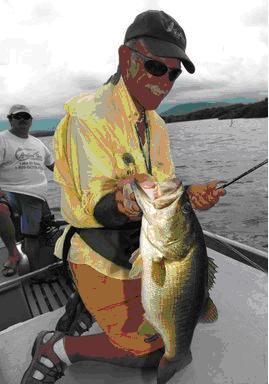
is the bug featured here. The results?
Here’s one picture, but you’ll have to ask
my El Salto December trip companions for the
full “truth.”
Tying Instructions
(For best viewing: (1) Maximize
your Browser Window. (2) Type "Ctrl
+ or -" to enlarge or contract the
webpage display. (3) Use the
Horizontal and Vertical Scroll Bars
to scroll right and up/down to
display larger photos in your
browser)
|
-
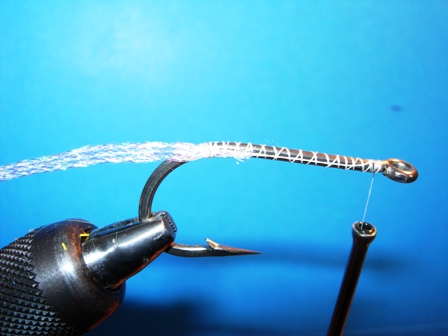
Cover the hook shank with the 6/0
thread from the hook eye to the back
end of the barb, leaving the thread
behind the eye. At that point tie in
an 8” piece of Radfloss (see below
under “hints” for a picture of
Radfloss) or similar 3/8” wide mylar
ribbon. Wrap the thread over it to
the back end of the barb, and return
the thread to the hook eye.
|
 |
|
|
-
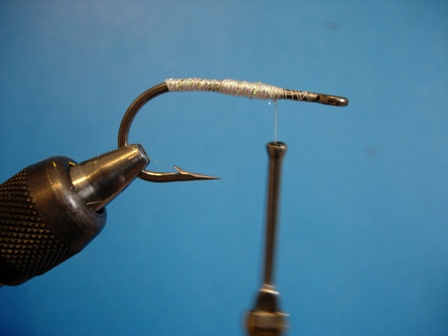
Wrap the Radfloss forward to a point
about 3/8” behind the eye; wrap it
rearward in wide wraps, then forward
again to achieve a cigar shaped
taper. Tie it off and again move the
thread to the eye.
|
 |
|
|
-
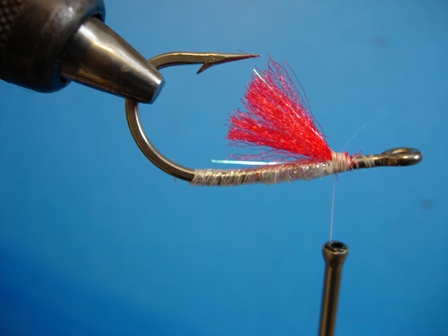
Turn the fly over and tie in a
throat of red antron yarn. It should
extend rearward only to the point of
the hook.
|
 |
|
|
-
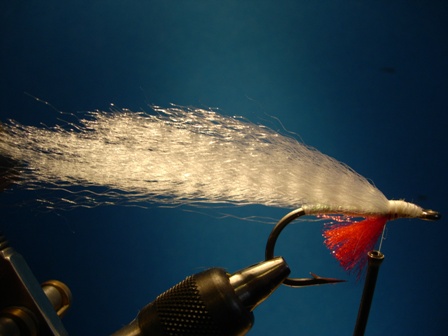
Return the fly to the upright
position and tie in a bunch of
Superhair equal to about two pencils
width. Begin tying it in just behind
the eye, and rearward to that same
3/8” point (where the Radfloss
ends). Make sure it is tied in
directly on top of the shank, and
make adjustments as needed to
achieve this goal. Place a tiny drop
of superglue on the top of the
thread winds.
|
 |
|
|
-
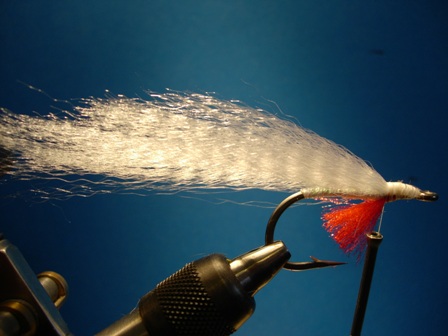
Tie in about 12 strands of pearl UV
Krystal Flash at the same point by
doubling the material around the
thread. This will make the interior
of the fly come alive. Wrap it down
to the rear of the head area.
|
 |
|
|
-
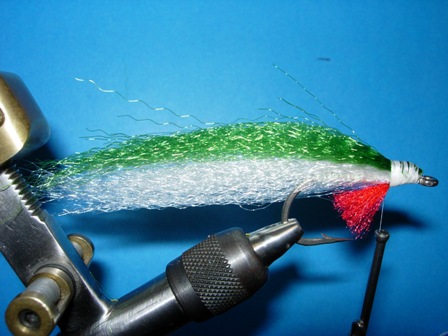
Tie in a bunch of blue-green
Superhair (same size bunch as white)
in the same manner as the white
Superhair was tied in.
|
 |
|
|
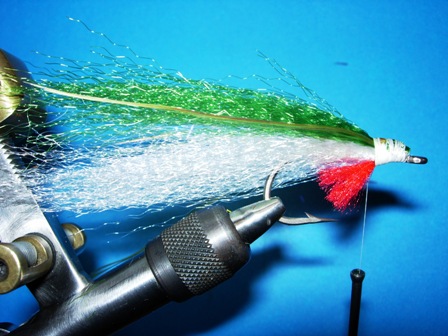
-
Tie in about 12 strands of gold
Flashabou in the same manner as the
interior flash, except pull ½ of the
material down onto either side of
the fly. This will form the side
flash.
|
 |
|
|
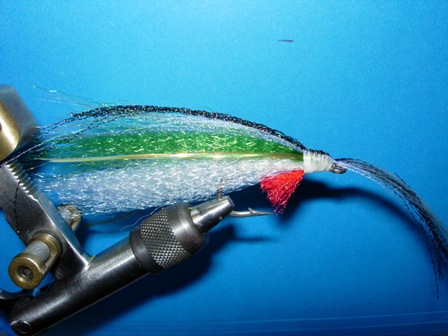
-
Tie in about 12 strands of the UV
Herring color Krystal Flash. This
time tie it down in the middle of
the bunch, allowing the front half
of the bunch to stick out over the
hook eye, with the rear half
extending back over the top of the
fly.
-
Using the same method, tie in a
similar bunch of fine black Crystal
Flash. Be sure to wrap it down all
the way to the back of the eye.
-
Whip finish the 6/0 thread and then
tie on the flat waxed nylon thread,
wrapping a nice even head. Leave the
thread at the rear of the head area.
|
 |
|
|
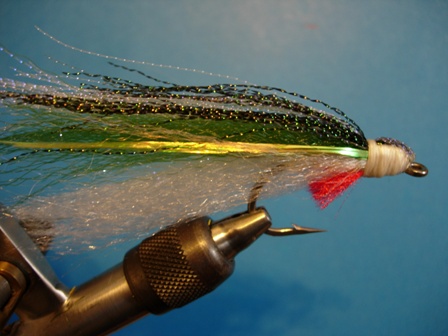
-
Take the UV Krystal Flash and the
black Crystal Flash that are
sticking out over the eye, and pull
them tightly rearward. They will mix
but that is a good result. Tie them
down with a few wraps at the rear of
the head and whip finish there. This
forms a “stripe” over the top of the
head. Place a tiny drop of superglue
on top of the head.
|
 |
|
|
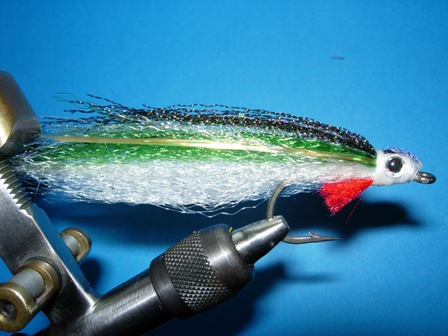
-
After allowing the superglue time to
dry, place the eyes evenly onto the
sides of the head.
|
 |
|
|
-
Coat the head with a nice coat of
epoxy, extending it rearward about
1/8” beyond the end of the head.
Place the fly on a rotating dryer
and leave it there until the epoxy
is firmly set (the setting time will
vary with the type of epoxy used).
|
 |
|
|
|
Tying
Tips
-
If you want to add a weed guard, tie
in 30 or 40# Hard mason onto the
hook bend before step 2, and finish
the weed guard by tying it in just
behind the eye, before step 13.
-
After the fly is complete and
the epoxy is dried, taper the
fly by barbering the rear ends
of the Superhair material.
-
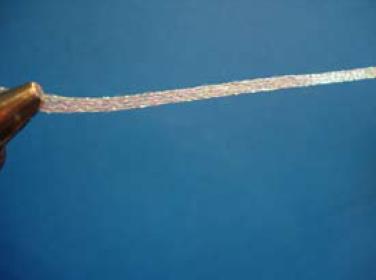
Here is a picture of “Radfloss.”
|
|
 |
|

