Description
Last month we featured a baetis
cripple pattern. This month we’ll tie a very
popular baetis nymph.
Anyone who has experienced a baetis
(or, blue winged olive mayfly) hatch knows
that nymph patterns representing baetis larvae
can be phenomenally successful at times. I
recently had such an experience on the Upper
Sacramento River on a cold overcast
afternoon. At around 1:00 p.m. I began
seeing tiny baetis adults on the
surface, but no surface fish activity. I had
been fishing two stonefly nymphs on a short
line rig; the baetis hatch inspired
me to add a tiny PT (pheasant tail) nymph as
a “stinger” trailing behind the bottom
stonefly. I selected a #18 “swimming”
version of the PT, which also included a
bead and a piece of mylar tinsel added over
the wing case. The reaction was immediate—a
series of large fish, all on the PT, taken
from pocket water on one of my favorite
Upper Sac stretches, including a lunker that
I lost as he disappeared over the lip of the
pool and threw the hook after straightening
the hook. At around 3:00 p.m., the action
stopped as if someone had dropped a curtain.
Noticing that my hands and feet were nearly
frozen, I headed for the truck with a smile
and a loud “yes-s-s-s-s-s.”
I talked to Bob Grace the next morning at
the Ted Fay shop. When I told him about the
tiny fly, he showed me his “two-minute
PT”—but that’s another story. I did watch
him tie one and yes, it’s done in two
minutes. I promise to feature this fly in a
future column, after I get Bob’s permission.
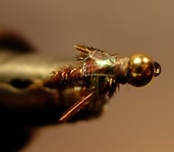
For the time being, let’s build a Beadhead
Flashback Swimming PT.
If you’d like to read more on baetis
mayflies and their behavior, go to
www.troutnut.com for good, plain English
angler-oriented information; once you are on
that site, use their search tool to find
baetis info.
Tying Instructions
|
|
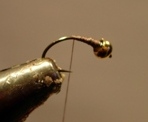
1. Smash the hook barb unless you are using
a barbless hook. Slip the bead onto the hook
and wrap 3 or 4 turns of fine (.010) lead
wire behind the bead. Apply a thin layer of
Flexament on the hook shank and cover the
shank with thread, including about half of
the hook bend. |
 |
|
|
|
|
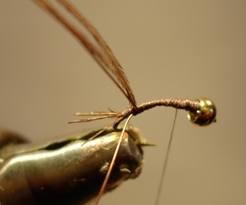
2. Tie in three pheasant tail fibers
as tails, splaying them out. They
should be short—no longer than half
the shank length. Don’t cut the
butts.
3. At the same
point, tie in a piece of small copper wire. Pull it back and out of the way.
|
 |
|
|
|
|
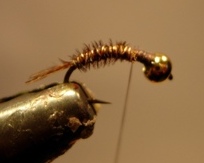
4. Using your hackle pliers, grab
the butts of all three PT fibers and
wrap them forward, leaving room for
the wing case behind the bead. Tie
off the fibers and trim the butts.
5. Grab the copper wire with your hackle
pliers, wrap it forward in even turns,
and tie it off at the same place as the
PT fibers were tied off. This
strengthens the PT abdomen.
|
 |
|
|
|
|
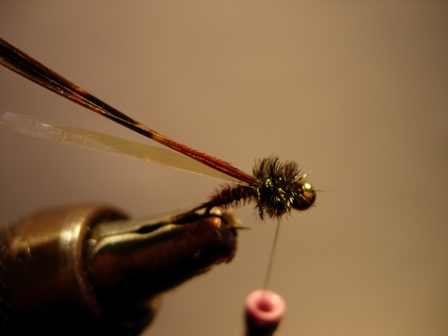
6. At the same point tie in a small
strip of mylar ribbing material and
let it lie back over the abdomen.
Tie in four PT fibers at the same
point. The mylar and PT fibers
should be pointing to the rear and
should be out of the way.
7. Tie in 4 peacock herls. Twist them
together and wrap them into the thorax
space, right up to the back of the bead,
where they should be tied off.
|
 |
|
|
|
|
8. Bring the PT butts over the top
of the peacock herl, tie them down
behind the bead, and don’t cut the
remaining butts, as t hey will
become the legs.
9. Bring the mylar over the top of the PT
Wing case and tie it down behind the bead.
Pull the PT fibers back and tie them down
in that position. Tie everything down firmly
behind the bead and apply a tiny drop of
super glue at that point.
10. Whip finish.
|
 |
|
|
|
|
Tying
Tips
1. Bob Grace substitutes black midge-size
sparkle braid (made by UTC, and in spools)
for the peacock herl. It looks nearly
identical to peacock and is much more
durable.
2. Substitute copper or black
beads for the gold bead called for in the pattern to change the appearance of
the fly slightly. I like to carry such different versions in case the fish start
rejecting the “standard” tie.
Fish this little gem in pocket
water during an afternoon baetis hatch and hold on. Go rip a few lips,
and…. |
|
|
|
|
 |
|

