|
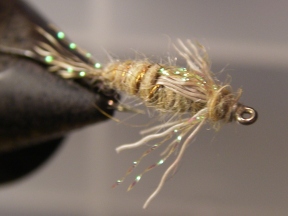
Ron's Krystal Hare's Ear
|
Materials:
|
|
Hook:
|
Mustad C53S, Tiemco
200R, or Daiichi 1260,
sizes 12-18
hook-up eye, short
shank, wide gape
(1/0-2/0) |
|
Thread:
|
Brown or dark brown 8/0 |
|
Tail:
|
Dark thin deer hair, one
strand of light orange
or green Krystal Flash |
|
Interior Flash:
|
Pearl fine flashabou or
crystal flash |
|
Rib:
|
Three strands of ultra
thin copper wire |
|
Abdomen: |
Medium dark Hare’s Ear
dubbing |
|
Thorax: |
Same as abdomen |
|
Wing case: |
8 deer hair fibers,
using the butt section,
and 8 strands light
orange or green Krystal
Flash |
|
Head: |
Same as abdomen; option:
add gold or copper bead
matched in size to hook
size |
|
Weight:
|
(Optional) Lead wire or
substitute, or lead wine
foil (see instructions
at end of article) |
|
|
Description
From time to time I like to feature patterns
created by anglers who know how to catch
fish and can tie patterns that work. This
month I asked my friend and guiding
associate Ron Rabun to present his version
of the venerable Hare’s Ear. He calls it
Ron’s Krystal Hare’s Ear. I can attest to
the success of this pattern. Just take a
look at Ron’s fish picture that accompanies
this article. Here’s Ron’s description:
“This
is a variation of the Flash Back Hare’s Ear.
I first tied this Hare’s Ear variation in
1976 to fish the Callibeatis emergers at
Lake Solano. The deer hair provides some
flotation and the fly would move in the
surface film in a bubble. As I further began
to develop my short line nymphing, this fly
became my first pick as the dropper because
it represents both mayfly and caddis
emergers.
Three things make this pattern effective.
First, deer hair and weighting gives it
neutral buoyancy. Second, the color and
sizing simulates various stages of many
emerging mayflies and caddis. Finally, the
subtle flash provides a strike target.
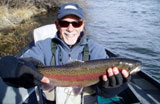
On January 14th, 2007 while
fishing the Upper Sac Winter Season, I
landed 3 fish and two were on the KHE size
18 as the dropper. The Rainbow pictured
above was one of those fish. In conclusion,
the KHE’s success can be directly attributed
to the fact that in my short line nymphing
technique, it is the first fly seen by the
fish. The rest lies with the reliable
response of the fish to take this pattern.”
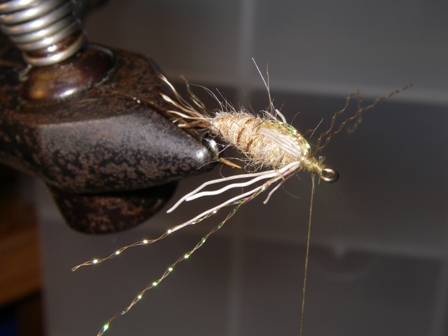
Tying Instructions
|
1. Optionally,
add bead to hook and apply weight nymph style with 3-4 wraps of lead wire at
the thorax. I use wine foils because I use a technique that creates a
tapered body. See my explanation below.
2. Select 8 deer hairs
and tie in the tips for the tail, no longer than 1 gap of the hook. Wrap the
butts half way up the hook because you will be using these on the wing case.
Don’t cut the butts.
3. Tie in one orange
or green Krystal Flash strand and create a fork as part of the tail. Trim to
length of the deer hair tail fibers.
|
 |
|
|
|
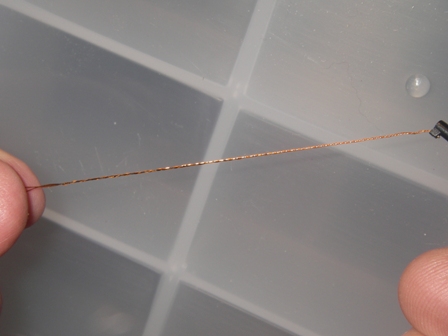
4. Select three
strands of extra fine copper wire (if you don’t have extra fine just use one
strand of copper wire). Take the three strands and twist tightly to form a
strand that looks like it is variegated. Tie in the wire just ahead of the
tail. See tip below.
|
 |
|
|
|
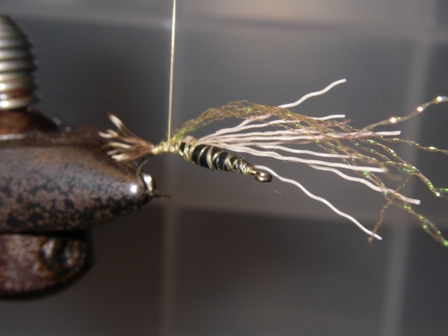
5. Select 8 Krystal
Flash strands (same color as legs) and tie in on top of the abdomen just
behind the wing case position.
|
 |
|
|
|
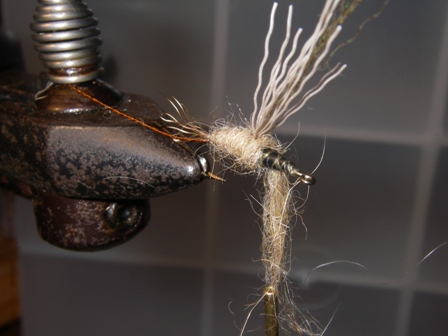
6. Dub the Abdomen to
under the wing case with the medium dark Hare’s Ear dubbing.
|
 |
|
|
|
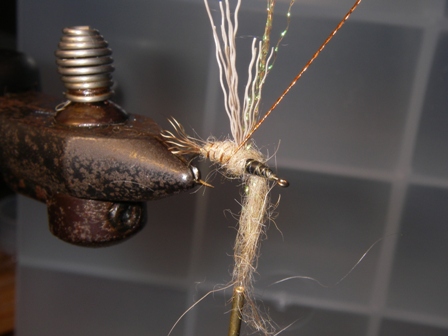
7. Wrap the copper
wire 3-4 wraps to under the wing case and tie off and cut.
8. Add final dubbing
to the thorax.
|
 |
|
|
|
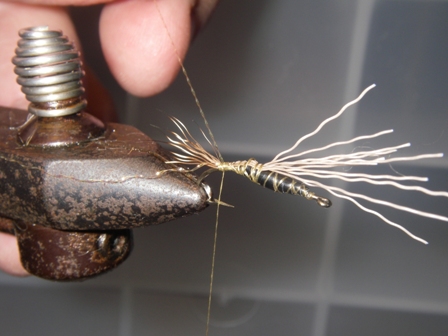
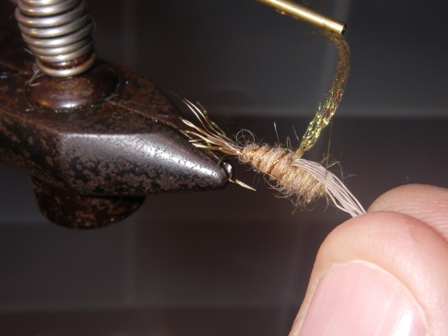
9. Take deer hair
butts and tie down as the wing case. Don’t cut the butts. Leave space for
the head.
|
 |
|
|
|
10. Take the Krystal
Flash strands and tie over the wing case to form a subtle flash back.
11. Cinch down both the
deer hair and krystal strands.
12. Form the legs by
separating three deer hairs and two krystal strands for each side of the fly
and tie/cinch down holding toward the hook point. Trim remaining butts and
krystal strands.
|
 |
|
|
|
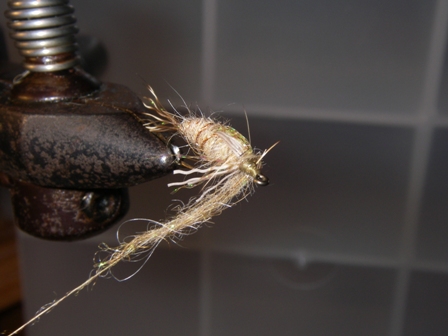
13. Trim the legs at
the hook point for correct length. Finish head with Hare’s Ear dubbing and
tie off thread. See below for glue/whip finish technique.
|
 |
|
|
|
|
Tying
Tips
|
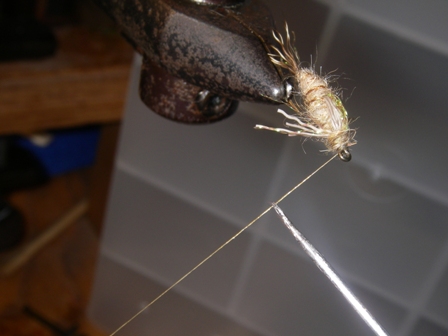
Tying Tips - Ron adds the following tips:
1.
Note on cementing head:
I have used super glue for head
cement with resounding success.
I take a drop and place it in a
small container, and then take a
very small amount on the needle
point and place it on the thread
before doing the whip finish.
These never come apart. You can
also use the very small drop
directly on the head if it is
small enough not to soak into
the fly. See photos below.
|
 |
|
|
|
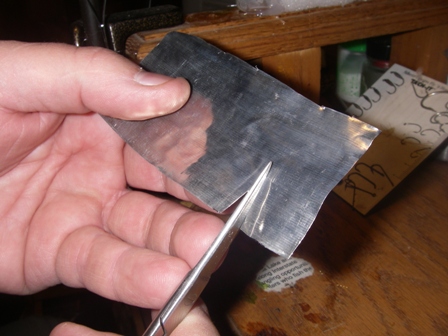
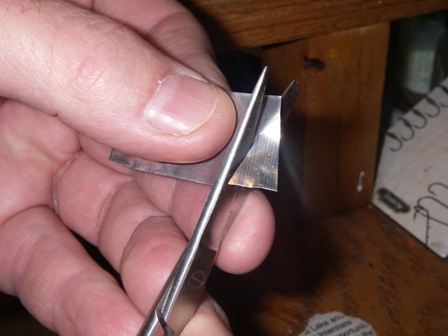
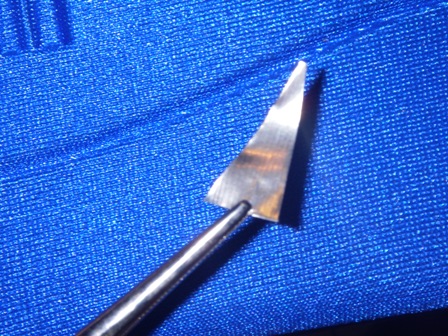
2. Wine Foil Weighting:
That older ‘reserve’ wine you have
been saving has now just become more
valuable. So drink it. I think I
have cornered the market on old lead
wine foils for the purpose of
weighting my flies. Everyone tries
different techniques during their
fly tying practice. Many of you may
have tried to use old lead wine
foils and found that cutting them
into strips was not effective. The
secret is to cut the pieces into
triangles and roll them onto the
hook shank. The triangles are cut to
the size proper for the pattern size
with the intent of creating a
tapered mound on the hook shank. I
secure the wine foil in two ways:
First, by wrapping thread under
the foil prior to rolling on to the
shank; secondly, by cinching down
the two ends of the rolled foil to
keep it from rolling. I then wrap
the foil with thread and then tie
the fly normally. See photos below.
[Editor’s note: if you don’t
have wine foil, use adhesive-backed
lead strips which can be found at
the fly shops, or at a golf pro shop
where they use it to add weight to
golf clubs.]
|
 |
|
|
|
|
|
 |
|
|
|
|
|
 |
|
|
|
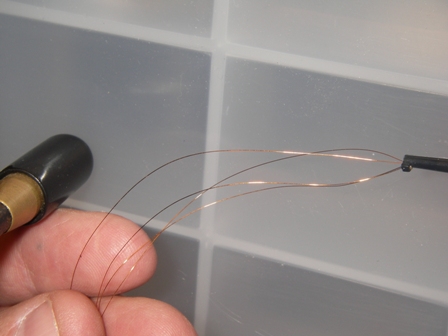
3.
Twisting wire: See the photos at right.
|
 |
|
 |
|