Description
Andy Burk needs no introduction to the world
of fly tying; he’s practically a legend. But
he’s also a darned nice guy. Andy has
produced many U-Tube videos on fly
tying—and, of course, these are all free. He
has also made or been featured in
commercially marketed DVDs on fly tying.
Andy has, over the years, developed many
original patterns, some of which have (at
least in my case) accounted for many “nice”
fish. Andy formerly wrote the “At the Vise”
column in the California Fly Fisher
Magazine; I was honored to take over that
column once Andy moved along to other
ventures.
I’ve used Andy’s Aggravator Prince Nymph for
bass and trout in still water angling. The
fly, with its sexy motion, attracts fish and
induces strikes and takes. Tie up a few of
these and toss them to still water trout and
bass.
Tying Instructions
|
|
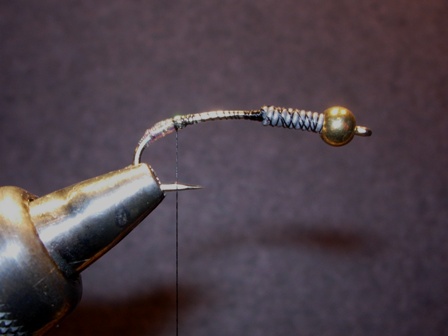
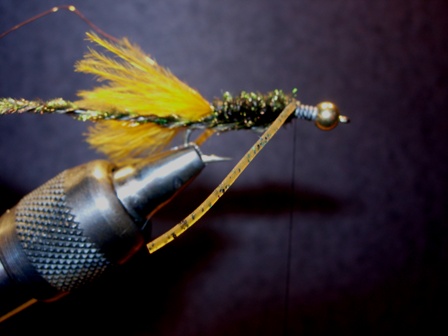
1.
Smash the hook barb, apply the bead
to the hook, and wrap weighting wire
in the thorax area.
2.
Cover the shank with thread, leaving
it at the rear of the hook, just
above the back of the barb. Tie in
two pieces of pearl Crystal Flash
and wrap them down the bend to the
half way point, and then back to the
tie-in point. Tie it off and trim
the excess.
|
 |
|
|
|
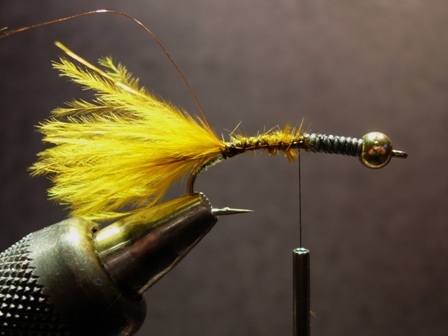
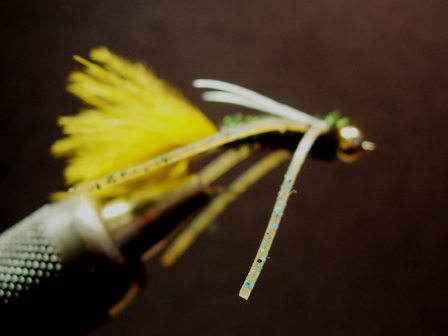
3.
Cut or strip a small bunch of
olive-brown marabou from the quill,
and tie it in at the front end of
the Crystal Flash tag, to form the
tail. The tail should be
approximately the length of the hook
shank.
4.
Tie in a piece of gold wire at the
same spot; this will be the ribbing
material.
|
 |
|
|
|
|
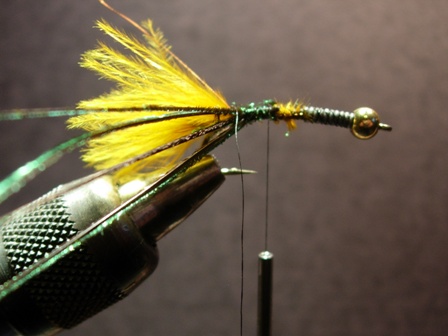
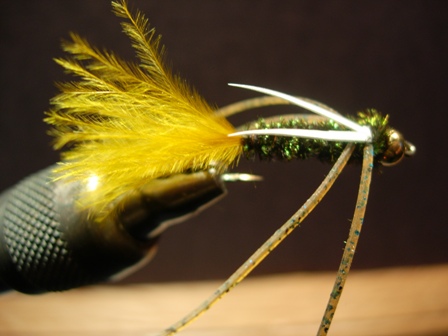
5.
At the same spot, tie in 3 or 4 long
strands of peacock herl and
form a loop of the thread;
leave the loop with the herl, but
cut one leg of the loop at the
shank. Move the thread forward to
the hook eye. Using your hackle
pliers, grab all of the peacock herl
strands and the single strand of
thread. Twist the thread and herl
counterclockwise until you form a
herl “chenille.”
|
 |
|
|
|
|
6.
Wind the peacock “chenille” forward
to form the abdomen; stop
winding when you have reached the
2/3 point on the shank, and tie off
the herl. Don’t trim it yet, as we
will use the rest of it to finish
the thorax.
|
 |
|
|
|
|
7.
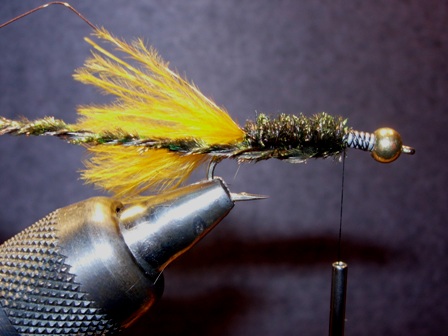
At that same front 2/3 point, tie in
the first set of legs by laying a
section of leg material
perpendicular across the hook shank
and tying it down. Figure-8 wrap the
leg material; don’t trim it yet.
|
 |
|
|
|
|
8.
Pick up the herl chenille once again
and take a few wraps in front of the
first set of legs, sweeping them
rearward. Tie off the herl again and
move it out of the way. Apply a
second set of legs in the same
manner as the first set.
|
 |
|
|
|
|
9.
Rib the abdomen and thorax areas
with the fine gold wire and tie off
the wire in front of the thorax.
10.
Cut two long white biots from the
stem.
Tie
them in at the front of the thorax
and place a drop of glue at the
tie-in point.
11.
Using the remainder of the herl
chenille, wrap a collar of peacock
herl behind the bead and tie it off.
Whip finish behind the bead.
|
 |
|
|
Now go throw one of these beasts
to some still water bass or
trout with an intermediate sink
line, and….
 |
|

