Description
Last month we learned two important tying
techniques: (1) creating an extended body
with foam; and (2) creating a “dubbing
brush” for a pull-over style fly. Hopefully,
you have practiced at least the first of
those two techniques, because you will need
to create a foam extended body in order to
tie the Hexagenia Dun that is the subject of
this article. We will use the “dubbing
brush” technique for another pattern in a
future article.
Several years ago I had the privilege of
visiting Labrador to fish for the giant
Brook Trout that inhabit many of the lakes
of that province, and about which Lee Wulff
wrote many years ago. In some circles, Lee
has been credited with “discovering” this
area and its fishery. The goal of our trip
was to be there during the Hexagenia
hatch—and, as luck would have it, we hit it
perfectly. We arrived at our
destination—Lake Marie—in a rainstorm. Our
float plane landed, and we disembarked at
the lodge. Dinner was served and it was time
to “wader up” and climb into the boats.
Despite the rain and wind, the Hex hatch
occurred right on time—just before dark. Big
Brookies slashed the surface all around us,
and multiple hookups was the watchword. From
there the hatch just got better each day;
there were even bugs on the water during the
day, constantly being eaten by cruising
trout. The highest-producing fly for that
trip, for our entire group, was one I
created for the trip and which is quite
similar to this month’s pattern.
I have also fished Hex hatches at Lake
Natoma, the Fall River, and most recently at
Henderson Springs, where a group of GBF
members caught a large number of very big
trout on Hex patterns in the last hour
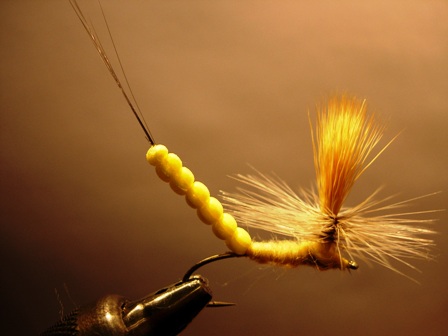
before dark. For me, the best pattern was
Bill’s Hexagenia Adult, the fly featured
here. As I mentioned above, it is similar to
the pattern that has been such a success in
Labrador.
So, let’s get started—those big trout are
out there waiting for the Hex’s to hatch.
Tying Instructions
|
1.
Follow the instructions
in the June Leader for creating
a foam extended body.
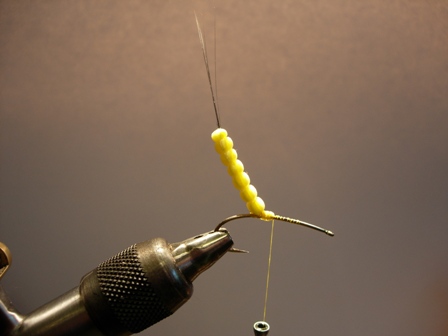
2.
Once you’ve created the
extended body, insert a large
needle into the back end of the
extended body and allow it to
remain there. This will cause
the foam to “relax” so the hole
does not disappear once the
needle is removed.
3.
Cut 2-4 microfibbets from
the synthetic “skin” to which
they are attached. Remove the
needle from the foam and
immediately stick all of the
microfibbets, butt end first,
into the hole. Place a tiny drop
of super glue at the point where
the microfibbets enter the foam
body.
4.
Debarb the hook and place
it in the vise. Tie the thread
onto the hook and run it back to
the point of the hook.
5.
Using the “stub” that you
left on your extended body,
attach the body to the hook
right above the hook point. Tie
the foam stub down securely.
|
 |
|
|
|
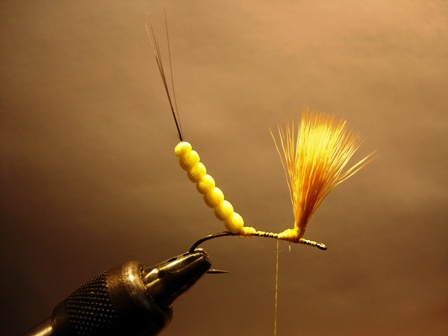
6.
Move the thread forward to the
front 1/3 spot on the shank, and there
tie in a bunch of yellow deer hair with
the tips pointing out over the hook eye.
This will be the wing and the post for
the hackle. Complete the post as you
would any post for a parachute style dry
fly. The post/wing should be the length
of the hook shank. Place a drop of super
glue at the base of the wing.
|
|
|
|
|
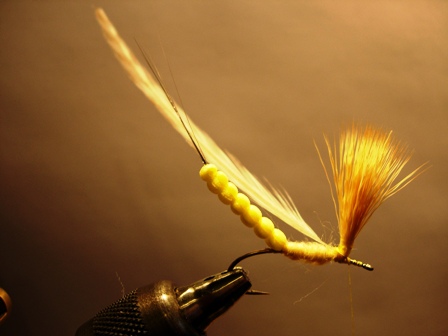
7.
Return the thread to where the
extended body was tied in (i.e., above
the hook point). Create a dubbing loop,
fill it with the pale yellow dubbing,
and return the thread to the rear of the
wing base.
8.
Dub a robust abdomen, stopping at
the rear of the wing base.
9.
Tie in a high quality dun colored
neck hackle with long, stiff barbules,
immediately behind the wing base,
locking it down securely with the
thread.
10.
Using a dubbing loop, dub a
robust thorax around the area below the
deer hair wing, and forward to just
behind the hook eye.
|
 |
|
|
|
11.
Grab the tip of the
hackle and wind it up the post 2
or 3 times in wide wraps, and
then make close wraps down the
post, making sure each wrap is
beneath the previous one. There
are a lot of opinions about
whether to wind the hackle
clockwise or counter-clockwise;
just pick one method and master
it. Tie the hackle off just
behind the eye, trim it, and
whip finish.
12.
Apply a drop of super glue to
the post at the top of the
hackle winds, and another to the
fly’s head. Admire your
handiwork, and….See ya on the
creek.
|
 |
|
|
 |
|