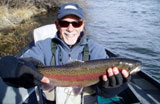
Description
The Stick Caddis pattern has been very
successful over the years. It was born many
years ago in its original form on the North
Yuba, one of my favorite streams. The
current versions of the fly (there are
several) reflect a long metamorphic history of tweaks
and improvements. One of my favorite
versions is the one I call the "Fall Phase".
Although I use the Stick Caddis in one form
or another all year long (even for Winter
steelies on certain rivers), the Fall Phase
is reserved for the magic months of late
September, October, and November when the
October Caddis hatch is in full swing. Those
who have fished the fly can attest to the
fact that it is deadly when fished
properly, meaning fished as a "rock roller"
as Andy Burk would say, right on the
bottom. I combine this fly with an emerger
on the rigging, but that's next month's
article. For now, let's kick out a few Fall
Phase Stick Caddis.
Tying Instructions
|
|
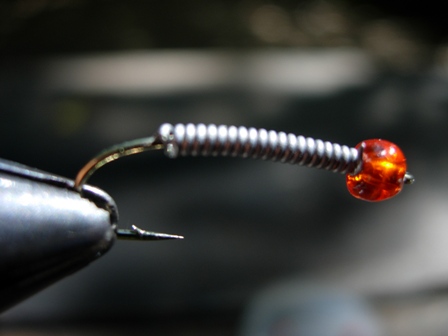
1. Smash the hook barb unless you are using
a barbless hook. Place the bead on the hook
and cover the shank with 15-20 wraps of lead
or substitute. Push the wire up against the
bead and cover the shank and wire with
thread. Apply a coat of Flexament to hold it
all together. |
 |
|
|
|
|
2. For the tail,
cut a small bunch of dark brown marabou and tie it in just above the back end of
the barb. With your thumb and forefinger shorten the marabou by pulling on it
sharply"don"t use scissors to cut it as it results in a blunt, non-lifelike
appearance.
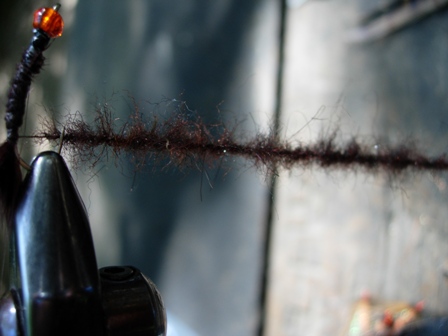
3. Form a
dubbing loop and insert your dubbing loop tool into the loop. Fill the loop with
the dark brown dubbing mix by pulling small bunches of it from a wad held in
your hand. This technique is very important to the overall silhouette of the
fly.
4. Twist the loop
into a "chenille" by spinning the dubbing loop tool. It helps to hold the loop
closed at the point where the dubbing inserted into the loop ends and then spin
the tool. |
 |
|
|
|
|
5. Using hackle pliers, grab the "chenille"
at its bottom end, cut the thread below the
pliers, and wrap the rear 1/3 of the body.
Don"t cut the "chenille;" rather, keep the
hackle pliers attached and move them out of
the way.
6. Tie in six pheasant tail fibers, two at
a time, spread around the hook. Sweep them
back and take a few wraps in front of them.
These are the "sticks;" they should be of
random lengths when you are done. |
 |
|
|
|
|
7. Move the thread forward and repeat steps
5 and 6 for the middle 1/3 of the body.
8. Take two wraps of dubbing in front of
the last set of sticks and tie off and cut
the dubbing loop. Place a few more "sticks"
in front of these last wraps. |
 |
|
|
|
|
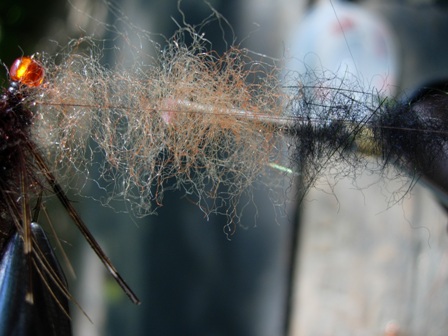
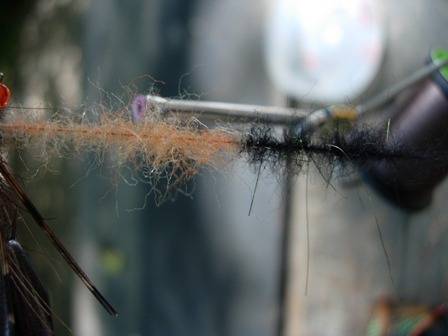
9. Form a second dubbing loop; place three
small bunches of burnt orange dubbing and
two small bunches of black dubbing into the
loop. Twist the loop as in step 4 and wrap
the "chenille" forward to behind the bead.
This creates the two collars"first the burnt
orange, and then the black. Tie off and trim
the loop. |
 |
|
|
|
|
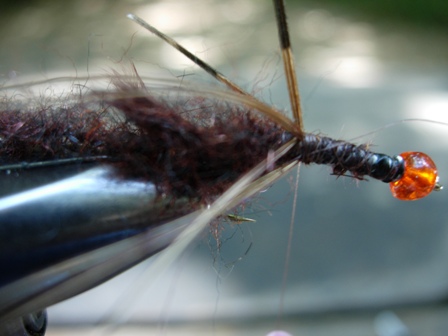
10. Tie in a
black or dark brown hen hackle wet fly style and take three wraps behind the
bead. Tie off and trim the hackle. Whip finish.
|
 |
|
|
|
|
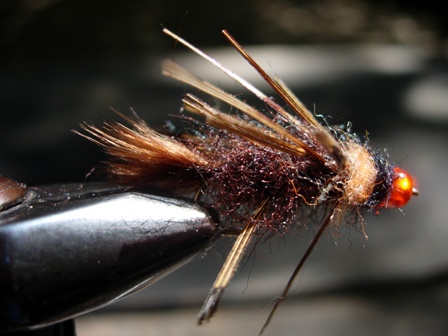
Finished Bill's Fall Phase Stick
Caddis Fly |
 |
|
|
|
|
Tying
Tips
1. Don"t blunt-cut marabou after it"s been
tied in as a tail. Instead, use your
fingernails to "pop" it off at the proper
length. This creates a more lifelike, uneven
appearance that looks much better in the
water.
2. When forming a dubbing
loop, always close the top of the loop by dropping the bobbin over the loop and
then wrapping forward on the shank. This makes it much easier to keep the
material inside the loop as you work with it.
Fish this beast in pocket
water. The reason I call it the "Fall Phase" is because during the emergence the
larva changes color from pale yellow to a burnt orange tone. See ya on the
creek. |
|
|
|
|
 |
|